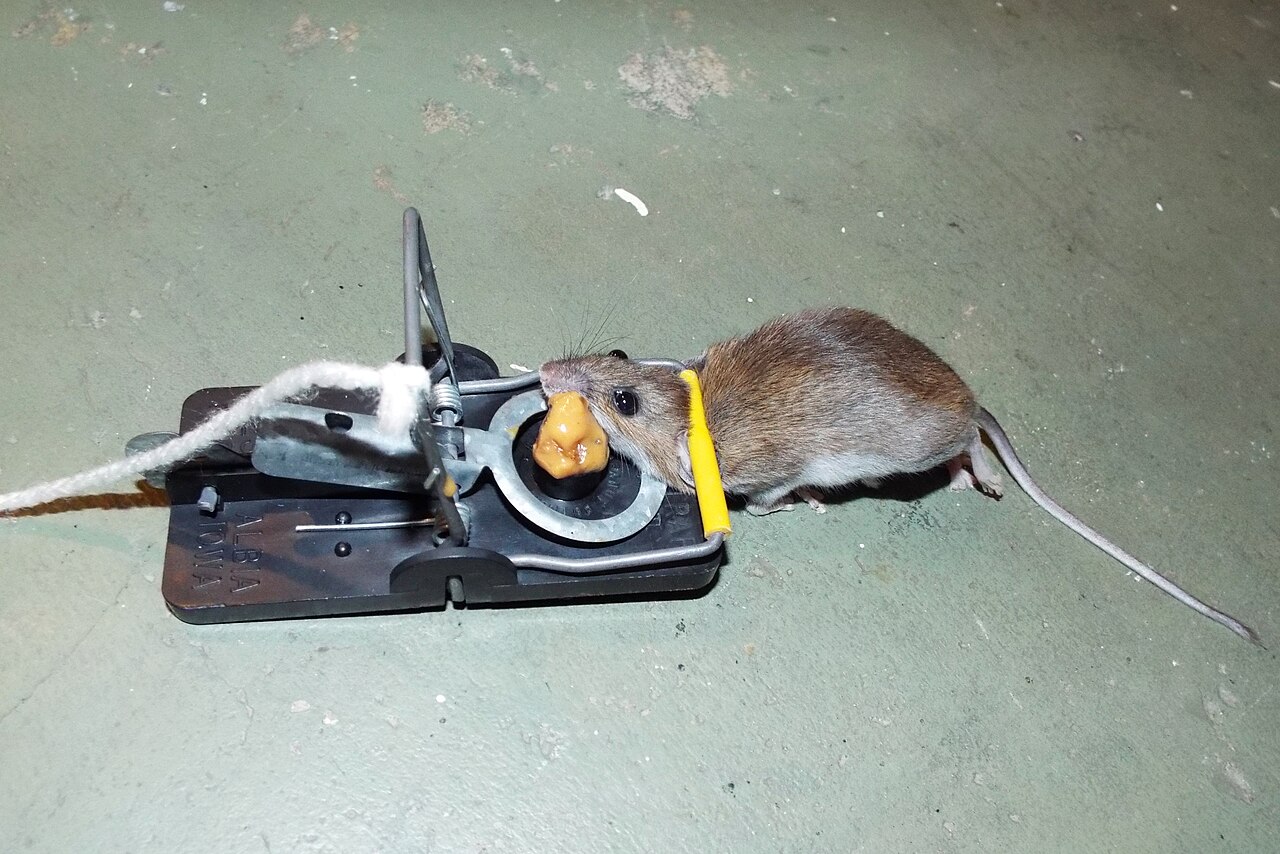
Look at the photo on this post for a second. That’s a live mouse standing on a loaded snap trap, eating the peanut butter, and the trap hasn’t fired. Nothing is broken. A mouse that comes in slow and licks instead of grabs can clean a trap off without ever putting real weight on the trigger, and plenty of them learn to do exactly that.
We’re not showing you that to sell fancier traps. We’re showing it because it makes the point that matters in August: trapping is the smallest part of keeping mice out of a garage. The part that actually works is sealing the garage so they never get in, and the window for doing it right is now, before the first cold nights push every mouse in the neighborhood toward a warm wall.
Why the garage falls first
When mice get into a Utah County house, the garage is almost always the beachhead. From the mouse’s side it makes sense. The big door opens and closes all day. The concrete slab holds warmth into the night. There’s usually food in there, even if you don’t think of it as food. And one wall of the garage is shared with the heated house, which means the utility penetrations through that wall are a short hallway to the kitchen.
So when we mouse-proof a garage, we’re really defending the house. Here’s the order we work in, and it’s the same order you should use if you’re doing it yourself on a Saturday.
Step one: the big door
Close the garage door on a bright day, turn off the lights, and lie down on the slab. Anywhere you see daylight, a mouse sees a doorway.
The bottom seal is the usual failure. Rubber astragal seals flatten, crack, and shrink with age, and even a good seal can’t follow a slab that’s settled or heaved out of level. The worst spots are the two bottom corners, where the seal meets the vertical track. Those corners almost never close clean, and the little triangle of daylight there is the single most common rodent entry we find on any house.
The fixes, in rough order of effort: replace a flattened bottom seal (they slide out of the retainer and new ones are cheap), add a threshold seal to the slab if the concrete is wavy, and put rodent guards on the corners. Those are shaped metal or heavy rubber pieces made for exactly that corner gap, and they’re the difference between a door that looks sealed and one that is. While you’re down there, replace any side weatherstripping that’s chewed or curled.
Step two: the man door and the wall penetrations
The side door into the garage needs the same treatment as any exterior door: a sweep on the bottom with no gap at either end, and weatherstripping that actually touches the door. If the sweep is original to the house, it’s probably worn through.
Then walk the outside walls of the garage at ankle height with a flashlight. You’re looking for every place something passes through the wall: the gas line, the AC line set, the water spigot, the dryer vent if the laundry backs the garage, conduit for the EV charger. Builders foam these once and nobody touches them again for twenty years. Check the inside of the shared wall too, especially in the furnace and water heater closet if yours opens into the garage, because the plumbing and flue penetrations in there lead straight into the wall cavities of the house.
Step three: use materials mice can’t chew
This is where most DIY jobs go wrong. A can of expanding foam feels like a fix, but cured foam is nothing to a rodent’s teeth. They go through it like stale bread. Foam is a draft sealer, not an exclusion material.
What works is metal. Pack gaps with copper mesh or stuff steel wool in tight, then seal over it so it stays put. Copper costs more but won’t rust and bleed stains down your stucco the way steel wool eventually does in a spot that gets wet. For bigger openings and vents, quarter-inch hardware cloth, screwed down, not stapled. For gaps along the slab or foundation, mortar or a good polyurethane sealant backed with mesh. The rule is simple: if you could chew through it with enough patience, so can they, and they have more patience.
Step four: stop feeding and housing them
A sealed garage that’s full of food and bedding still gets tested every night. Dog food and bird seed in the original bags are the big two, and we’ve seen a winter’s worth of seed moved into a wall void one cheek-load at a time. Anything like that goes in metal or heavy plastic bins with lids. Grass seed counts. So does the emergency food storage, if it’s in cardboard.
Cardboard on the floor is the other gift. Boxes against the wall give mice covered runways and free nesting material in one package. Get storage up on shelves or into totes, and leave the bottom foot of your walls visible so you can see what’s happening down there.
Know where to look for evidence
Mice hug walls and edges, so the proof hides where you don’t look: behind the chest freezer, under the workbench, along the wall behind the storage shelves, in the corners of the water heater closet, and inside any box that’s sat on the floor since spring. Droppings look like dark grains of rice. Find fresh ones and you’ve got current traffic, not history.
One caution before you clean anything up. Utah has deer mice, and their droppings can carry hantavirus, so never dry-sweep or shop-vac a mess. Mist it with disinfectant, let it sit, wipe with gloves on, and bag it.
If you’d rather we did it
Some of this is easy Saturday work, and some of it (the corner guards, the flue closet, figuring out which of nine gaps is the live one) is easier with someone who’s sealed a few hundred garages. Our rodent service starts at $495 and includes the exclusion work, not just traps, with the final price confirmed on site. A tight rambler in Payson is a different job than a three-car garage in Mapleton that’s been feeding mice for two winters, and we’d rather look before we quote.
If you heard scratching last winter, or the dog food bag has a hole in the corner, this is the month to fix it while the mice are still outside. You can get a quote online or call us at (801) 494-3707 and we’ll find the gaps before the cold does. Yes, we can.